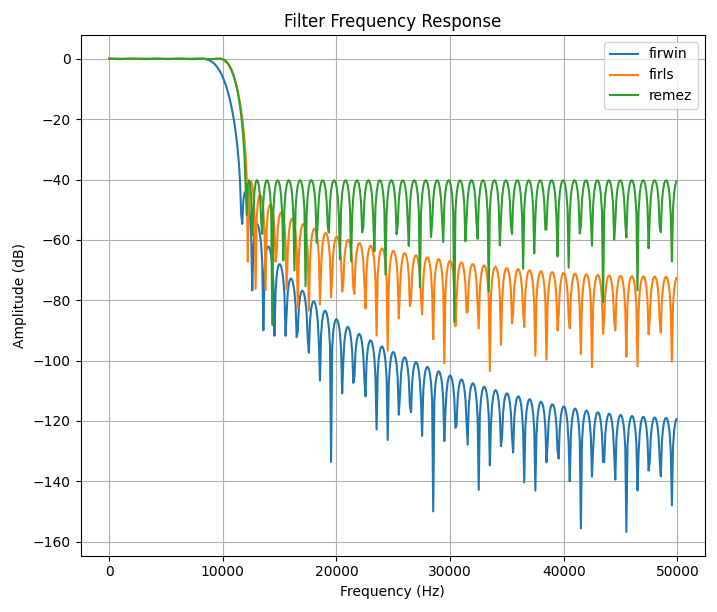
Basic FIR Filtering with Python
In this post, we will take a look at Python’s SciPy signal processing library to design a basic FIR (Finite Impulse Response) filters. We will walk through the implementation step-by-step and then apply these filters to some signals to demonstrate how they filter unwanted signals. This post is very basic and does not go into much detail on how FIR filters work.
Optimizing Custom FFT’s Speed on STM32
In this post, we’ll take the STM32 FFT algorithm from my blog “Writing Your Own FFT in Python and STM32” (link below) and focus on improving its execution speed. The goal is to minimize the number of clock cycles required to perform the FFT. To achieve this, we’ll remove unnecessary calculations, precompute the bit-reversal lookup table, enable compiler optimizations, activate the cache, and place buffers in faster memory. We’ll evaluate how each of these changes impacts performance, and compare our optimized algorithm to the CMSIS DSP library’s FFT.
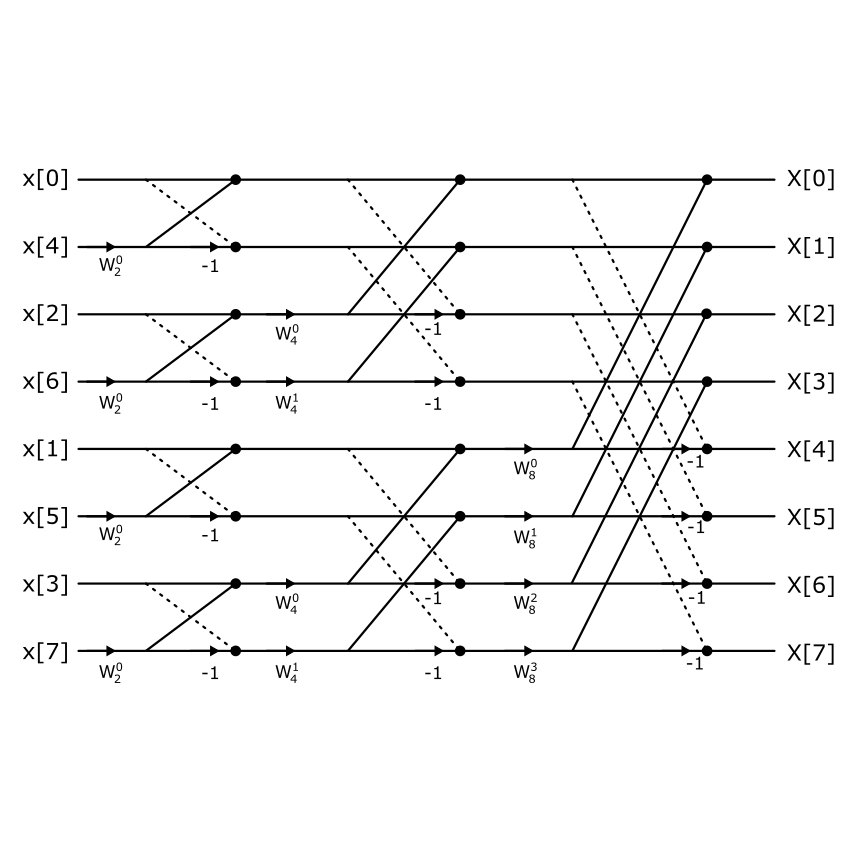
Writing Your Own FFT in Python and STM32
In this post, we’ll be diving into the process of writing our own custom Fast Fourier Transform (FFT) implementation from scratch. The FFT is a foundational algorithm in digital signal processing, used to convert time-domain signals into their frequency-domain representation. While many libraries and tools offer ready-made FFT functions, coding one yourself is a great way to build a deeper understanding of how it works under the hood.
I’ll start by lightly covering a bit of the theory but try and discuss implementing the algorithm itself in more detail. From there, we’ll jump into writing the code in Python, which allows us to test and visualize the results quickly. Then, we’ll bring it down to the hardware level by implementing the same FFT logic on an STM32 microcontroller, where things like memory usage and performance really start to matter.
The goal here isn’t to create the fastest or most optimized FFT, but to build something simple.
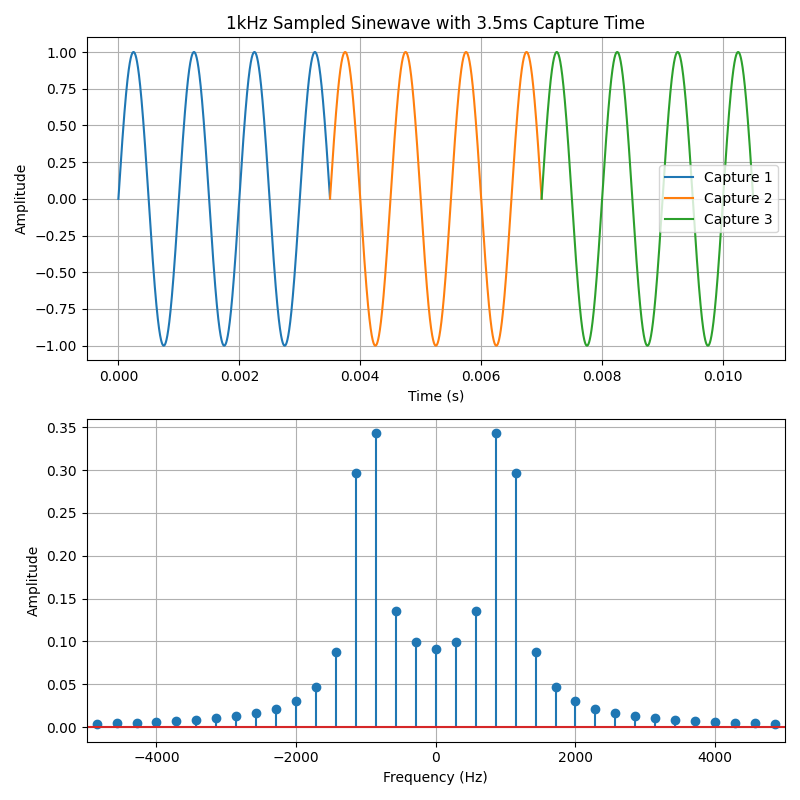
FFT with Python
In this post, I’ll walk through the basics of creating and plotting a discrete-time signal, then show how to analyze it in the frequency domain using the Fast Fourier Transform (FFT). Understanding how a signal behaves in both the time and frequency domains is a key skill in digital signal processing, and the FFT is one of the most powerful tools for doing that.
We’ll start by building a simple signal in Python, visualize it, and then compute its frequency spectrum. From there, we’ll run into a common and sometimes confusing issue called spectral leakage. It’s an important concept that affects how you interpret frequency-domain plots, especially when working with real-world signals. To address spectral leakage, we’ll introduce windowing, a technique that tapers the edges of the signal before performing the FFT. We’ll explore a few popular window types, understand how they work, and see their effects through practical examples.
This post is meant to be hands-on and applied.